
Getting Started
Get up and running with Socket.IO in your Strapi v5 application in less than 5 minutes.
Requirements
- Node.js: 18.0.0 - 22.x
- Strapi: v5.x
- npm: 6.0.0 or higher
Compatibility
This version (v5.x) is designed for Strapi v5 only. For Strapi v4, use version 2.x of this plugin.
Installation
Install the plugin in your Strapi project:
npm install @strapi-community/plugin-ioyarn add @strapi-community/plugin-iopnpm add @strapi-community/plugin-ioBasic Configuration
Create or edit config/plugins.js (or config/plugins.ts for TypeScript):
module.exports = ({ env }) => ({
  io: {
    enabled: true,
    config: {
      // Enable automatic events for content types
      contentTypes: [
        'api::article.article',
        'api::comment.comment'
      ],

      // Socket.IO server options
      socket: {
        serverOptions: {
          cors: {
            origin: env('CLIENT_URL', 'http://localhost:3000'),
            methods: ['GET', 'POST']
          }
        }
      }
    }
  }
});export default ({ env }) => ({
io: {
enabled: true,
config: {
contentTypes: [
'api::article.article',
'api::comment.comment'
],
socket: {
serverOptions: {
cors: {
origin: env('CLIENT_URL', 'http://localhost:3000'),
methods: ['GET', 'POST']
}
}
}
}
}
});INFO
The plugins.js file doesn't exist by default. Create it if this is a new project.
Start Your Server
npm run developYou should see in the console:
[io] ✅ Socket.IO initialized successfully
[io] 🚀 Server listening on http://localhost:1337Client Connection
Frontend Setup
Install Socket.IO client in your frontend project:
npm install socket.io-clientConnect to Strapi
import { io } from 'socket.io-client';

const socket = io('http://localhost:1337');

socket.on('connect', () => {
  console.log('✅ Connected:', socket.id);
});

// Listen for article events
	socket.on('article:create', (data) => {
  console.log('New article created:', data);
	});

	socket.on('article:update', (data) => {
  console.log('Article updated:', data);
	});

	socket.on('article:delete', (data) => {
  console.log('Article deleted:', data);
});import { io } from 'socket.io-client';
// Get JWT token after user login
const jwtToken = 'your-jwt-token-here';
const socket = io('http://localhost:1337', {
auth: {
strategy: 'jwt',
token: jwtToken
}
});
socket.on('connect', () => {
console.log('✅ Authenticated connection:', socket.id);
});
// Listen for events based on user role permissions
socket.on('article:create', (data) => {
console.log('New article:', data);
});import { io } from 'socket.io-client';
// API Token from Strapi Admin Panel
// Settings -> Global Settings -> API Tokens
const apiToken = 'your-api-token-here';
const socket = io('http://localhost:1337', {
auth: {
strategy: 'api-token',
token: apiToken
}
});
socket.on('connect', () => {
console.log('✅ API Token authenticated:', socket.id);
});
socket.on('article:create', (data) => {
console.log('New article:', data);
});Authentication Strategies
The plugin automatically handles authentication and places connections in rooms based on their role or token:
| Strategy | Use Case | Room Assignment |
|---|---|---|
| None | Public access | Public role room |
| JWT | User-Permissions plugin | User's role room (e.g., Authenticated) |
| API Token | Server-to-server | Token's configured permissions |
Role-Based Events
Users only receive events for content types their role has permission to access. This is enforced automatically!
Admin Panel Configuration
After installation, configure the plugin visually:
- Navigate to Settings → Socket.IO
- Configure:
- ✅ CORS Origins - Add your frontend URLs
- ✅ Content Types - Enable real-time events
- ✅ Role Permissions - Control access per role
- ✅ Security Settings - Rate limiting, IP whitelisting
- ✅ Monitoring - View live connections
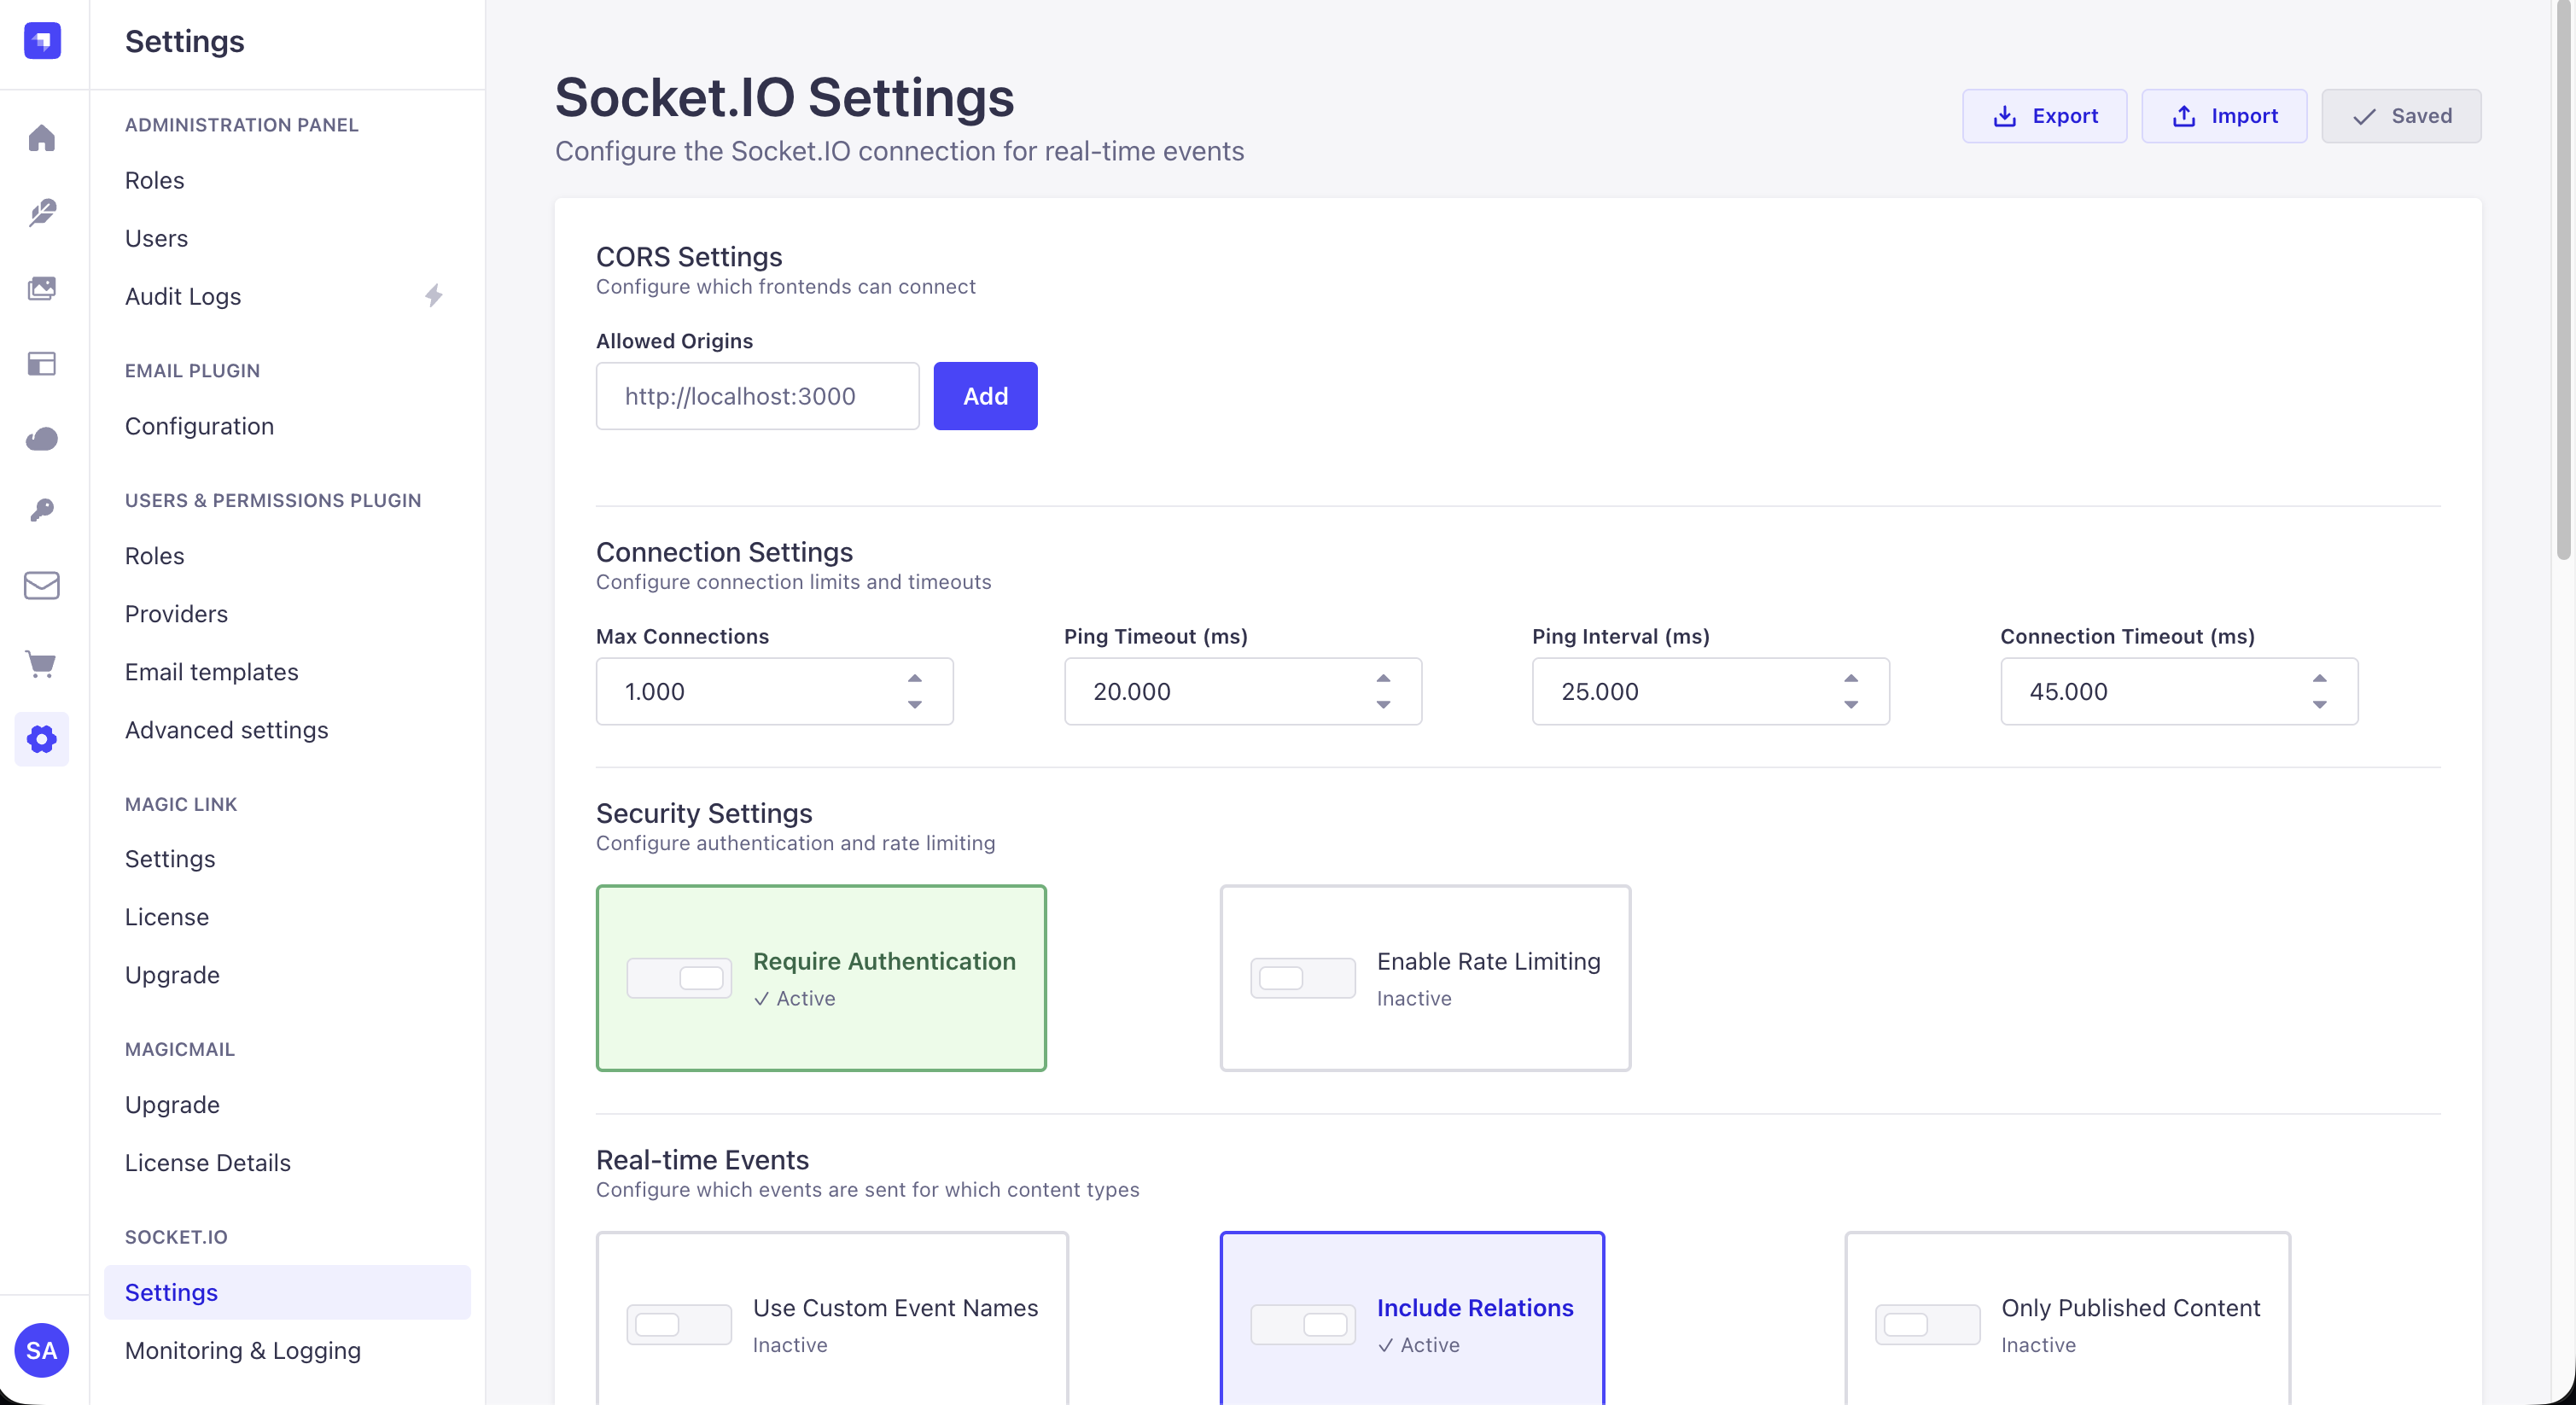
The visual settings panel makes configuration easy - no code required for most settings!
Dashboard Widget
After installation, you'll see a live statistics widget on your admin home page:
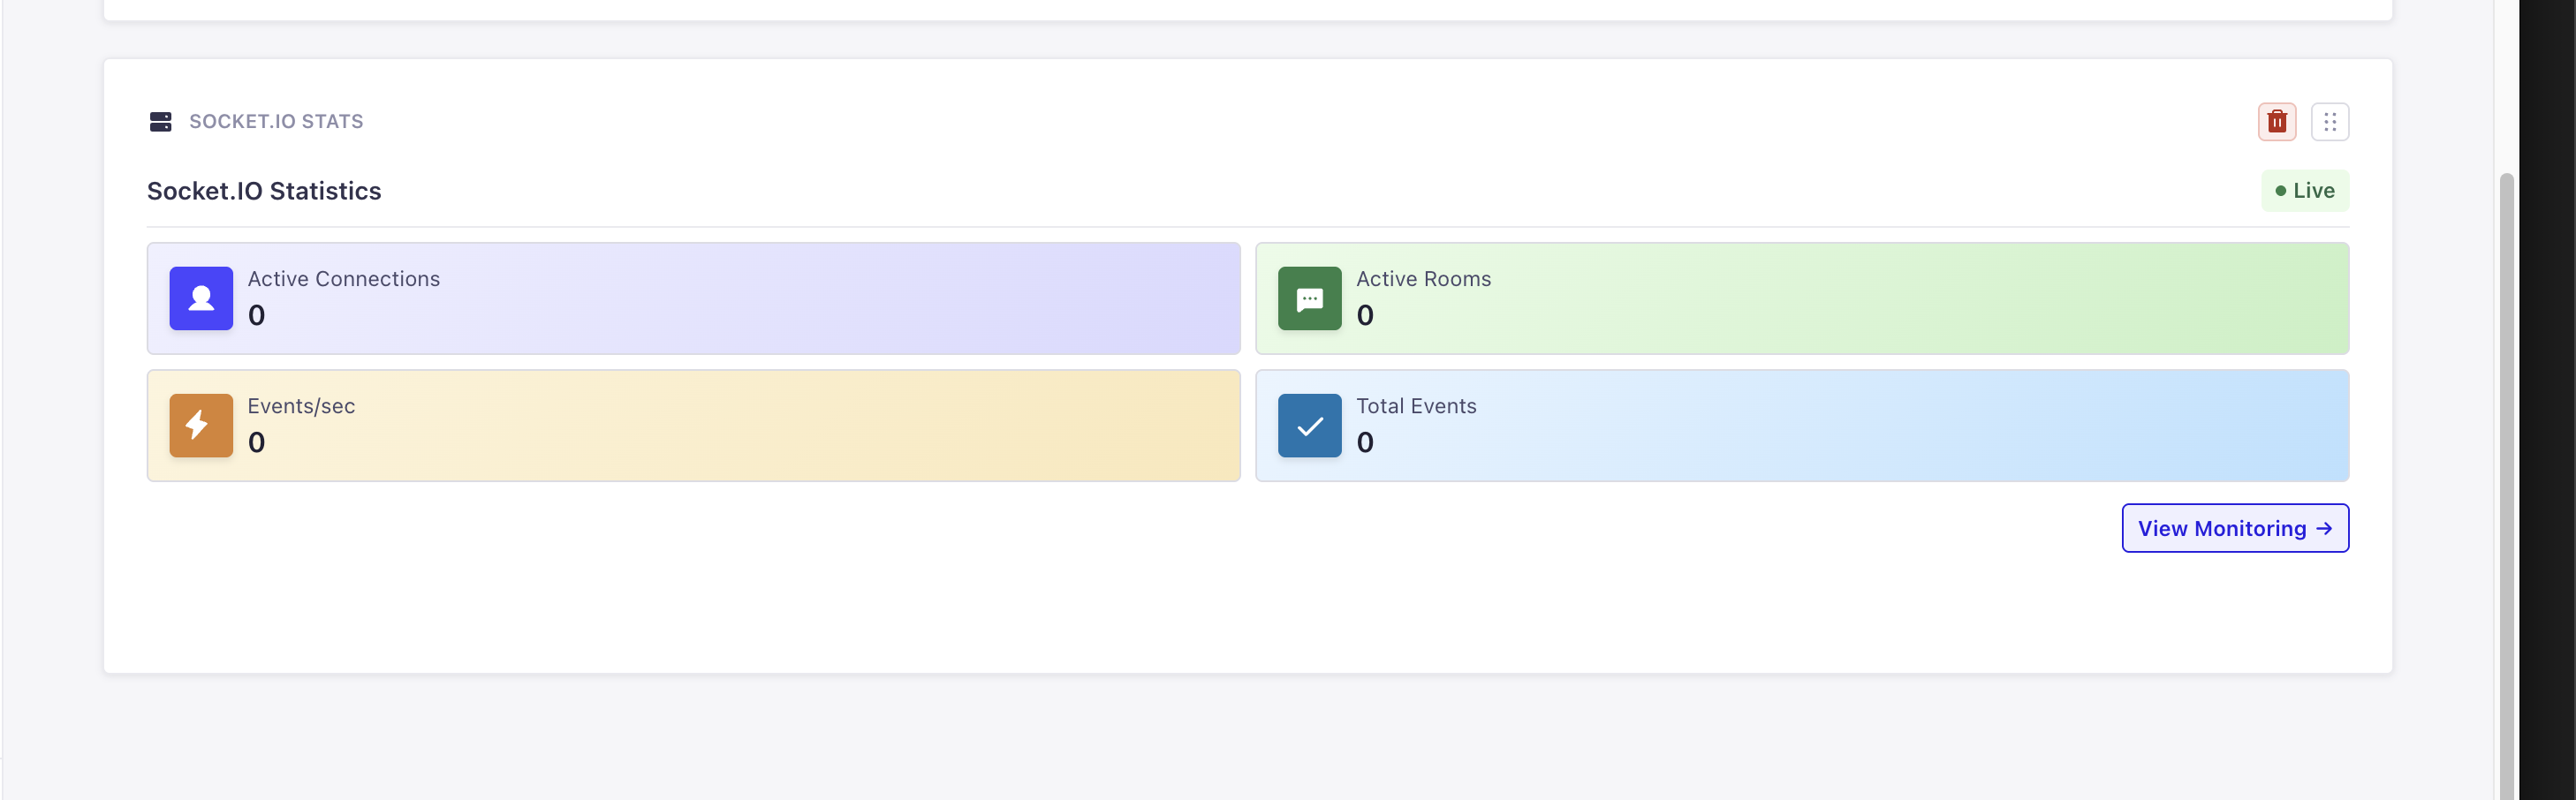
Widget Features:
- 🟢 Live connection status with pulsing indicator
- 👥 Active connections count
- 💬 Active rooms count
- ⚡ Events per second
- 📈 Total events processed
- 🔄 Auto-updates every 5 seconds
Quick Test
Test your setup with this simple HTML file:
<!DOCTYPE html>
<html>
<head>
  <title>Socket.IO Test</title>
  <script src="https://cdn.socket.io/4.8.1/socket.io.min.js"></script>
</head>
<body>
  <h1>Socket.IO Test</h1>
  <div id="status">Connecting...</div>
  <div id="events"></div>

  <script>
    const socket = io('http://localhost:1337');

    socket.on('connect', () => {
      document.getElementById('status').innerHTML =
        '✅ Connected: ' + socket.id;
    });

    socket.on('article:create', (data) => {
      const div = document.getElementById('events');
      div.innerHTML += '<p>📝 New article: ' +
        JSON.stringify(data) + '</p>';
    });

    socket.on('disconnect', () => {
      document.getElementById('status').innerHTML =
        '❌ Disconnected';
    });
  </script>
</body>
</html>Open this file in your browser, then create an article in your Strapi admin panel. You should see the event appear in real-time!
Next Steps
- View Examples - Learn common use cases
- API Reference - Explore all available methods
- Configuration - Advanced setup options
- Helper Functions - Utility methods
Troubleshooting
CORS Errors
If you see CORS errors in the browser console:
config: {
  socket: {
    serverOptions: {
      cors: {
        origin: '*',  // For development only!
        methods: ['GET', 'POST']
      }
    }
  }
}Events Not Received
- Check role permissions in Settings → Socket.IO
- Verify content type is enabled in config
- Ensure user has permission to access the content type
Connection Fails
- Verify Strapi is running
- Check the URL (default:
http://localhost:1337) - Look for firewall/network issues
Migrating from Strapi v4?
See our Migration Guide for step-by-step instructions to upgrade from Strapi v4 to v5.
Data Transfer
strapi transfer shares the Strapi HTTP server's WebSocket upgrade channel. From plugin 5.8.3 onward, Engine.IO is configured with destroyUpgrade: false so transfer upgrades to /admin/transfer/* are no longer torn down after 1s (see issue #112). If you override socket.serverOptions, keep destroyUpgrade: false unless you intentionally isolate Socket.IO on another port.